
 Save
Save
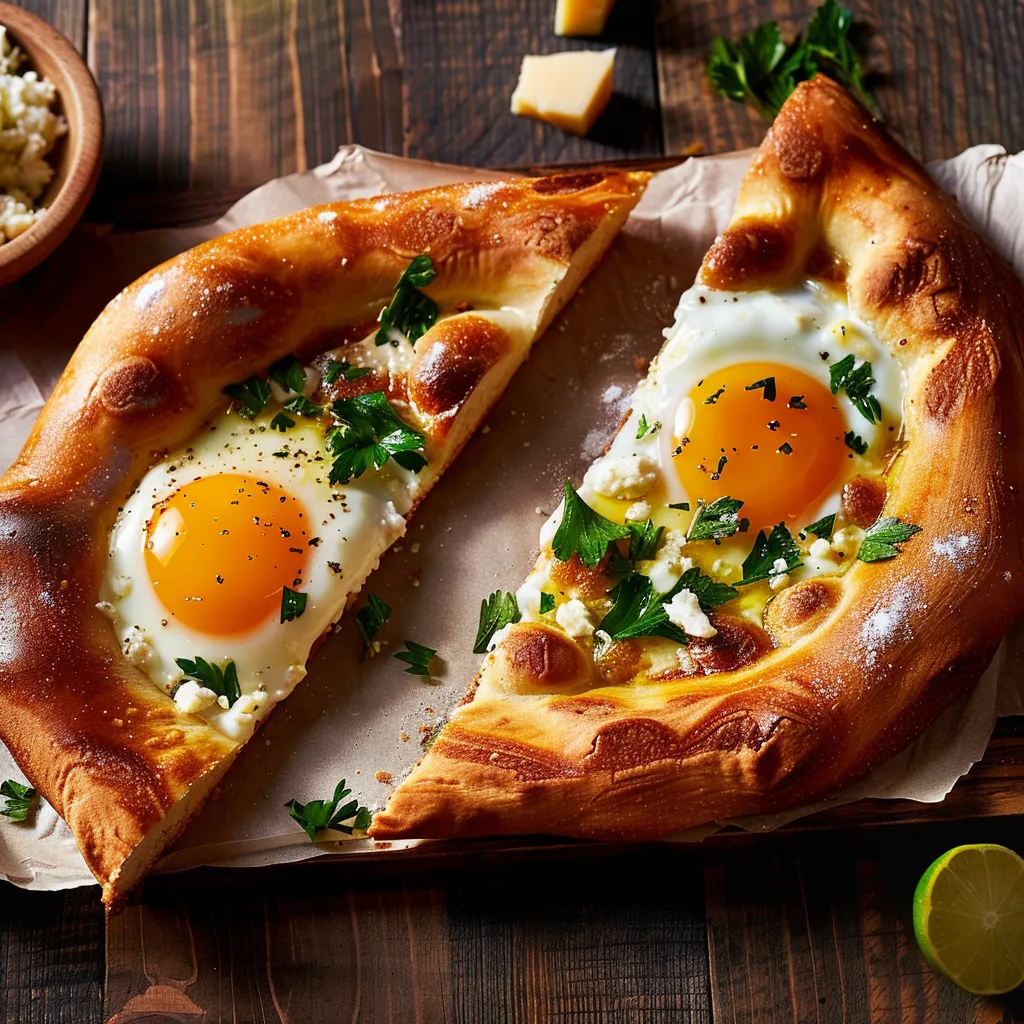
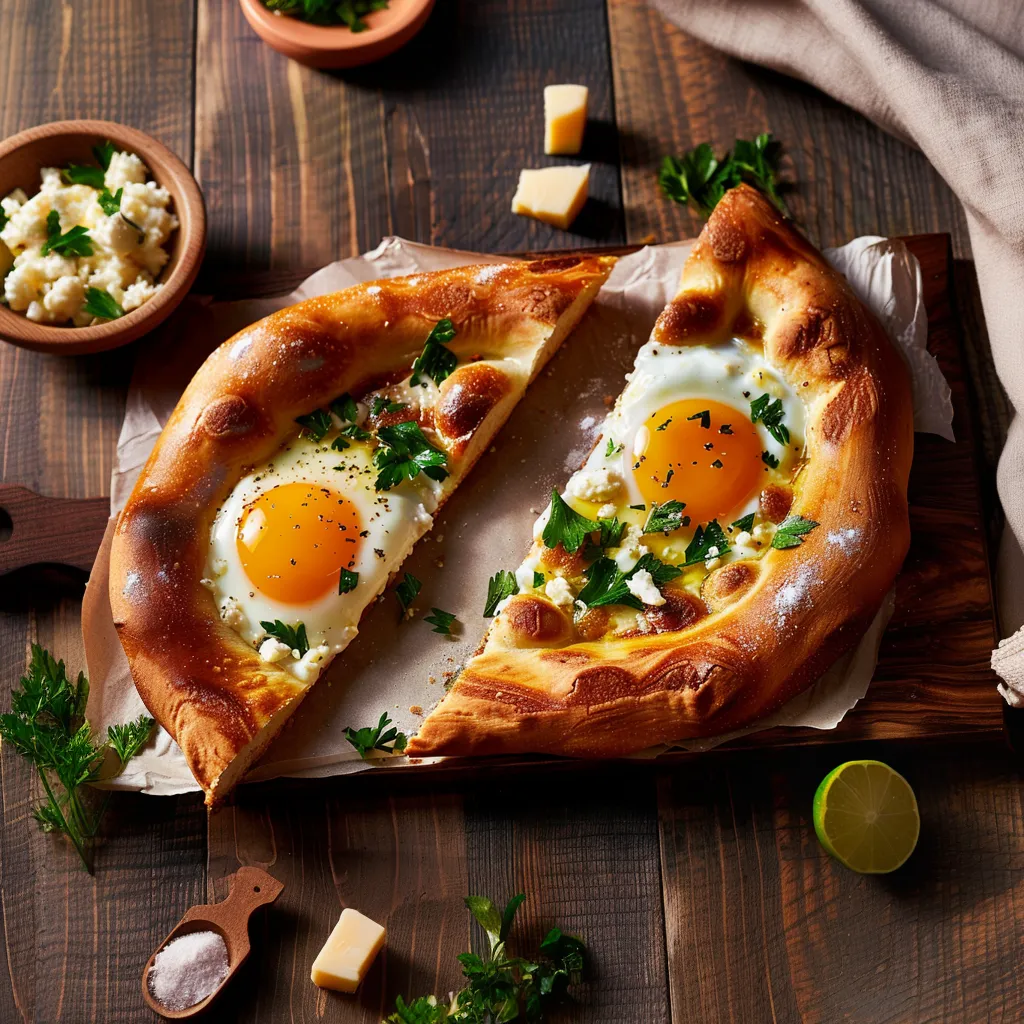
This traditional Georgian cheese bread transforms any meal into a feast with its soft dough cradle holding a molten cheese center and crowned with a perfectly baked egg. My first encounter with khachapuri during a cooking workshop changed my perspective on bread entirely, transforming it from a simple side to the star of the meal.
I first made this recipe when hosting friends for brunch, unsure if it would turn out well. The moment everyone tore into the bread, swirling the egg and butter into the hot cheese, I knew this would become a staple in my entertaining repertoire.
Ingredients
- Bread flour forms the sturdy yet tender foundation look for high protein content for the best structure
- Unsalted butter enriches the dough giving it that subtle richness that makes this bread irresistible
- Whole milk adds tenderness and flavor to the dough nothing compares to its richness
- Mozzarella provides that essential stretchy texture choose lowmoisture for best melting quality
- Feta cheese delivers the distinctive tanginess authentic to Georgian cuisine select a good quality Greek variety
- Ricotta adds creaminess and body to the cheese filling opt for whole milk ricotta for maximum flavor
- Fresh herbs bring brightness to the rich filling always choose vibrant, fragrant bunches
- Eggs for both the filling and topping farm fresh eggs will give the most vibrant color
- Coriander offers a subtle citrusy note that distinguishes khachapuri from other cheese breads
Step-by-Step Instructions
- Prepare the dough
- Heat butter and milk together until the butter completely melts. The temperature should be hot enough to dissolve the sugar but not so hot it kills the yeast when added later. Pour this mixture over the sugar, salt, and coriander in a large bowl, stirring until everything dissolves. Let this mixture cool to just warm to the touch before proceeding, as too much heat will damage the yeast.
- Create the dough
- Once the milk mixture has cooled to lukewarm, stir in the yeast and gradually add the flour until a shaggy dough forms. The texture will initially be rough and uneven, which is exactly what you want at this stage. Cover the bowl and allow the dough to rest for 10 minutes, which gives the flour time to fully hydrate and makes kneading much easier.
- Develop the structure
- Knead the dough thoroughly until it becomes smooth and elastic. When properly kneaded, the dough should spring back when lightly pressed with a finger and have a slightly tacky but not sticky feel. If working by hand, resist the urge to add too much additional flour, as this can make the finished bread tough.
- First rise
- Place the kneaded dough in a greased bowl, turning once to coat all surfaces. Cover with plastic wrap or a damp cloth and let rise in a warm spot until noticeably puffy but not necessarily doubled in size. This slower rise develops more flavor in the final bread.
- Prepare the filling
- Mix all filling ingredients until well combined but still textured. You want some pieces of cheese to remain distinct rather than creating a completely homogeneous mixture. This creates delightful pockets of flavor in the finished khachapuri.
- Shape the bread
- Divide the risen dough into four equal pieces and roll each into an oval about 10 inches by 6 inches. The dough should be thin but not so thin it tears when handling. Let these ovals rest covered for 15 minutes to relax the gluten before adding the filling.
- Form the khachapuri
- Spread the cheese filling in the center of each oval, leaving a border around the edges. Carefully fold the edges up and around the cheese, twisting the ends to create a boat shape. This shape is crucial for holding the filling and creating the traditional look.
- Second rise
- Allow the shaped khachapuri to rise until puffy, about 20 minutes. This rise is shorter but important for creating the light texture in the final bread. During this time, preheat your oven thoroughly to ensure even baking.
- Initial bake
- Brush the exposed dough edges with egg wash for a golden finish and bake until the dough is set but not yet browned. This partial baking ensures the bread structure is firm enough to hold the egg topping that comes next.
- Add the finishing touches
- Create an indentation in the center of each khachapuri, crack an egg into it, and add a teaspoon of butter on top. The residual heat from the partially baked bread and filling will begin to warm the egg even before it goes back in the oven.
- Final bake
- Return the khachapuri to the oven to finish baking until the egg is set to your preference. The white should be set but the yolk can remain runny if desired, creating a sauce that mingles deliciously with the cheese when stirred together.
 Save
Save
My Georgian friend taught me that the true test of authentic khachapuri is how well it holds its shape while still having a tender texture. Her grandmother would always press her thumb gently into the edge of the dough after the first rise. If it bounced back slowly but completely, the dough was perfect.
Making Ahead
Khachapuri dough can be prepared up to 24 hours in advance and refrigerated after the first rise. This slow, cold fermentation actually improves the flavor significantly. Simply shape the cold dough directly from the refrigerator, allowing a bit more time for the second rise before baking. The cheese filling can also be mixed and refrigerated separately, bringing it to room temperature before assembling.
Cheese Variations
While traditional Georgian khachapuri uses a specific Georgian cheese called sulguni, this recipe adapts with more widely available options. For an even more authentic flavor profile, try mixing equal parts low-moisture mozzarella and a good quality farmer's cheese. Alternatively, for a stronger flavor, substitute half the mozzarella with provolone or even a mild cheddar. The key is maintaining a good balance between melting cheeses and those that provide flavor.
Serving Tradition
In Georgia, khachapuri is traditionally served immediately after baking when the cheese is molten and the egg is perfectly set. Diners tear pieces of the bread from the edges and dip them into the cheese and egg mixture in the center. No utensils needed. It's customarily enjoyed with a simple green salad dressed with vinegar and a glass of Georgian wine, particularly Saperavi, whose acidity cuts through the richness of the bread.
Save
Recipe Q&A
- → What cheeses can I substitute in khachapuri?
While traditional khachapuri uses Georgian sulguni cheese, this version calls for a blend of mozzarella (or Muenster), ricotta, and feta. You can substitute with other melting cheeses like provolone, mild cheddar, or monterey jack. The key is maintaining a good balance between melty, creamy, and slightly tangy cheeses.
- → Can I make khachapuri ahead of time?
You can prepare the dough and filling a day ahead and store them separately in the refrigerator. Alternatively, you can shape and fill the breads, then refrigerate them (before the final rise) overnight. Let them come to room temperature and complete the final rise before baking. Already baked khachapuri keeps well refrigerated for up to five days.
- → How do you eat khachapuri properly?
The traditional way to eat khachapuri is to tear off pieces of the crust and use them to mix the hot egg into the cheese, then dip the bread into this mixture. Some people like to mix in the butter immediately while others prefer to let the residual heat melt it gradually as they eat.
- → What's the difference between regional khachapuri styles?
Georgia has several regional variations of khachapuri. This recipe is for Adjaruli khachapuri, the boat-shaped version with an egg on top from the Adjara region. Imeruli khachapuri is circular and completely enclosed with cheese inside. Megruli combines both styles with cheese inside and on top. Ossetian khachapuri includes potato and cheese filling.
- → What can I serve with khachapuri?
Khachapuri is hearty enough to be enjoyed on its own, but it pairs wonderfully with simple sides. Try a fresh green salad with a light vinaigrette, pickled vegetables, or a small bowl of Georgian-style vegetable soup. For breakfast, fresh fruit makes an excellent accompaniment. In Georgia, it's often served with wine or a refreshing tarragon soda called 'Tarkhun'.
- → How do I know when the eggs are perfectly cooked?
For traditional khachapuri, the eggs should be soft-set with runny yolks. This takes about 8-10 minutes of additional baking time. If you prefer firmer eggs, bake for 12-15 minutes after adding the eggs. The whites should be set but the yolks should still have some softness to mix with the cheese.